
Is your pellet heater failing to ignite? The igniter may be the culprit! Replacing an igniter is a straightforward process that you can tackle on your own, regardless of the brand of your pellet heater. Whether you own a Piazzetta, Palazzetti, Pellet Fires Tasmania or other pellet heater, this comprehensive how to replace a pellet heater ignitor guide will get your heater burning bright again!
Understanding Your Pellet Heater Ignitor
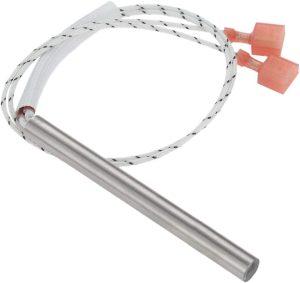
Your pellet heater ignitor is a small, electrically-powered device that sits inside the burn box, just behind the burn pot. It’s essentially a cylindrical rod that gets really, really hot, so hot that the air in your burn box causes the pellets to catch fire. That’s right. The ignitor doesn’t heat the wood pellets directly. The fire in the burn pot starts because the air is so hot the pellets catch fire.
Types of Ignitors
Before starting your replacement, it’s helpful to understand the different ignitor types available:
- Ceramic Ignitors – More durable but pricier
- Standard Ignitors – Standard ignitor found in 99.99% of pellet heaters
How to Know Your Ignitor Needs Replacement
The easiest way to tell if your pellet heater ignitor is working properly is by looking how your pellet heater behaves during start-up. There may be other causes for the below but often the cause of the issues below is an ignitor that is dead or on its last legs:
- Visual check: Look through your heater’s window and see if the ignitor is glowing red during startup
- Fire doesn’t start: If your burn pot fills up with pellets and the fire doesn’t start
- Slow fire ignition: The fire takes a lot longer than usual to take hold in the burn pot
Most ignitors last 3-5 years with regular use, so replacement is a normal part of pellet heater maintenance. I always keep one spare in the house just in case. You never know when you may need to replace the ignitor and not having a working pellet heater in the middle of winter is no fun. If your ignitor does fail and you don’t have a spare, check out my how to manually light a pellet heater guide to get your heater working again until you can replace the ignitor.
Materials Needed
- New ignitor (ensure model compatibility)
- Screwdriver (usually a Phillips head)
- Pliers (optional, for stubborn screws)
- Torch (for better visibility)
Step-by-Step Replacement Guide
Step 1: Safety First and Gather Your New Ignitor
Critical Safety Note: Always unplug your pellet heater from the wall and allow it to cool completely before beginning any work. This prevents electrical hazards and burns.
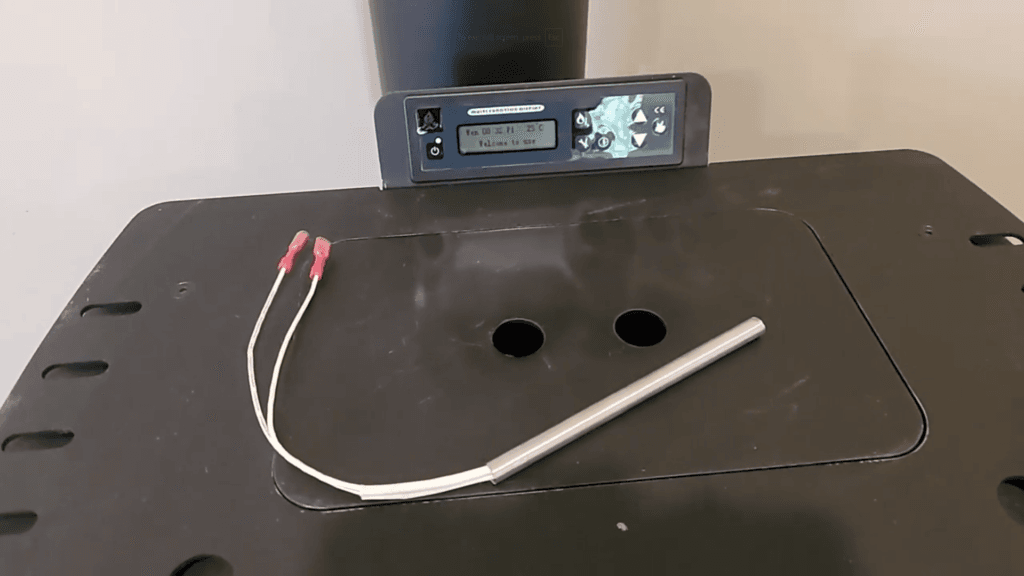
Start by obtaining the right ignitor for your pellet heater. Ensure it’s compatible with your specific model, as ignitors can vary significantly in size, wattage, and specifications between brands. Your new ignitor typically has two plugs on one end that will connect to the pellet heater.
Step 2: Access the Ignitor
Next, you need to access the ignitor inside your pellet heater:
- Turn off the power and unplug your pellet heater for safety
- Allow the heater to cool completely
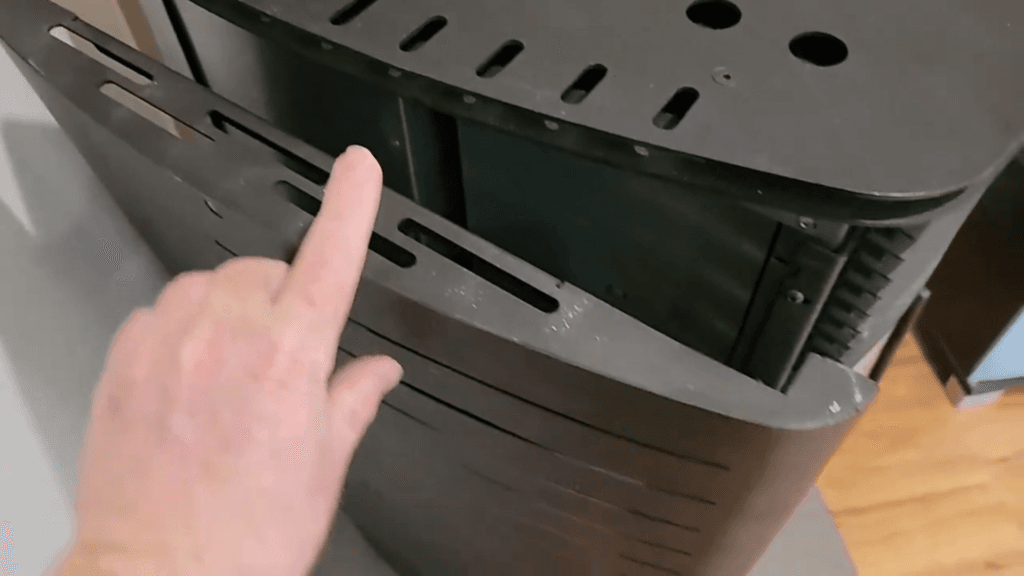
- Remove the side panel of the pellet heater (this may be held in place by screws; in some models, it could be a simple latch mechanism)
- Carefully take off the panel to reveal the internal components
Step 3: Locate and Remove the Old Ignitor
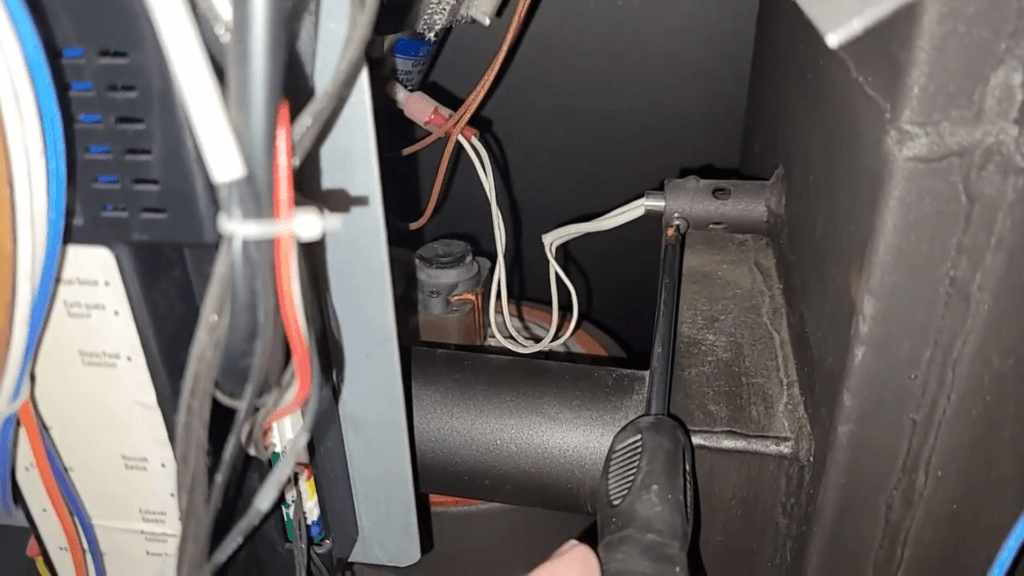
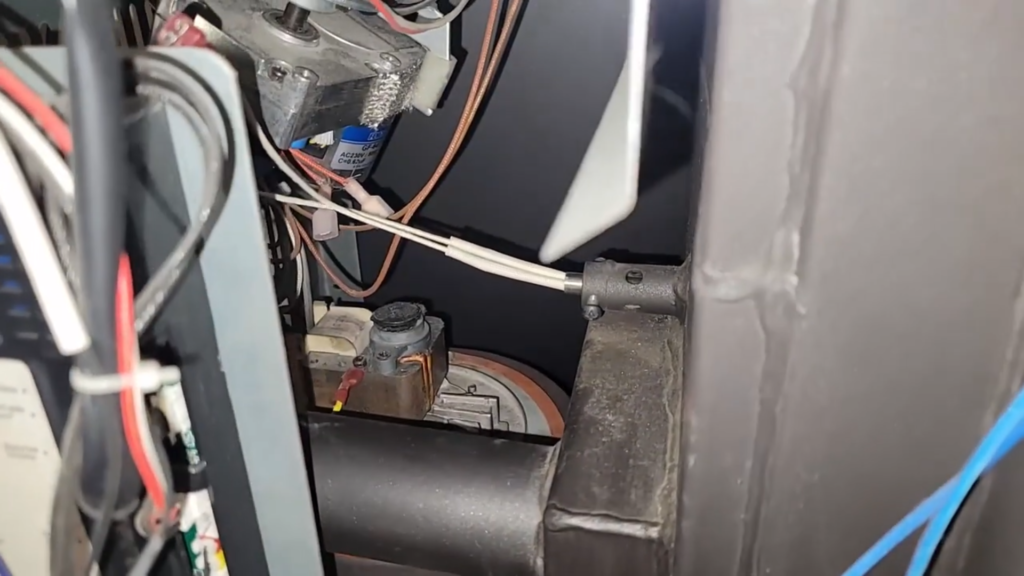
The ignitor is usually located near the burn pot, and you can often trace the thick, heat-shielded wire from the circuit board to find it:
- Look for a small metal rod-like structure behind the burn pot—this is where the ignitor sits
- You may need to move other wires around to gain access to the ignitor
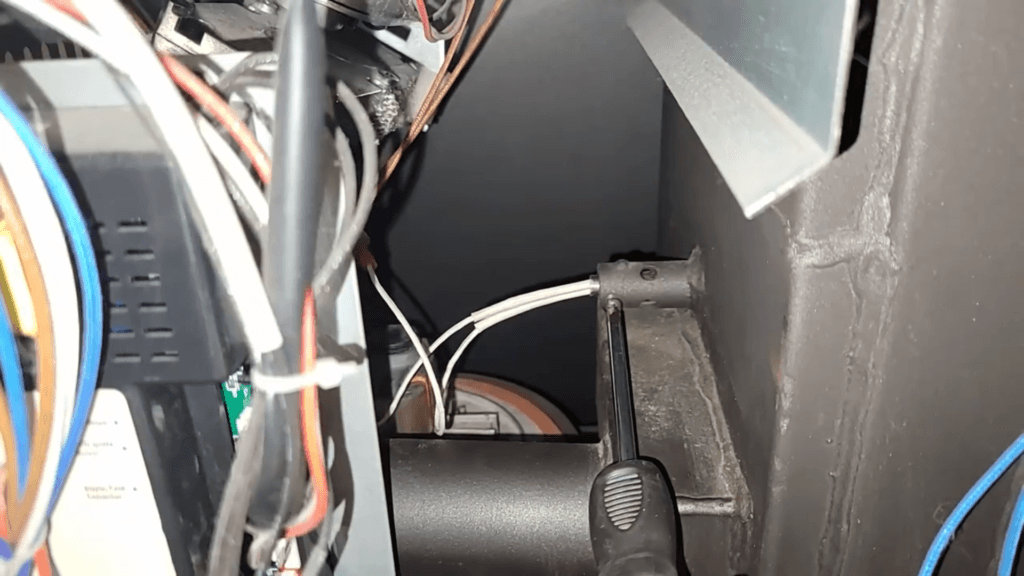
- Using your screwdriver, locate the screws that hold the ignitor in place
- You only need to loosen the screw holding the ignitor in place, do not remove it completely
Step 4: Disconnect and Remove the Old Ignitor
Before removing the ignitor, take note of its position and connections—this will help during reinstallation:
- Check your pellet heater is unplugged from the wall
- Make sure you have enough room (move other wires around) to pull the ignitor out
- Unplug the wires connected to the ignitor
- Remove the old ignitor from the pellet heater
Pro Tip: Take a photo of the wire connections before disconnecting to ensure proper re-connection.

Step 5: Install the New Ignitor
It’s time to install your new ignitor:
- Position the new ignitor in the same spot as the old one, making sure it fits securely
- Insert the new ignitor into the same slot where the old one was located
- Be careful not to push it too far in initially
- Reconnect the wires to the ignitor as they were before (note: wire orientation typically doesn’t matter for most models)
Step 6: Proper Ignitor Positioning
Correct positioning is vital for optimal functionality:
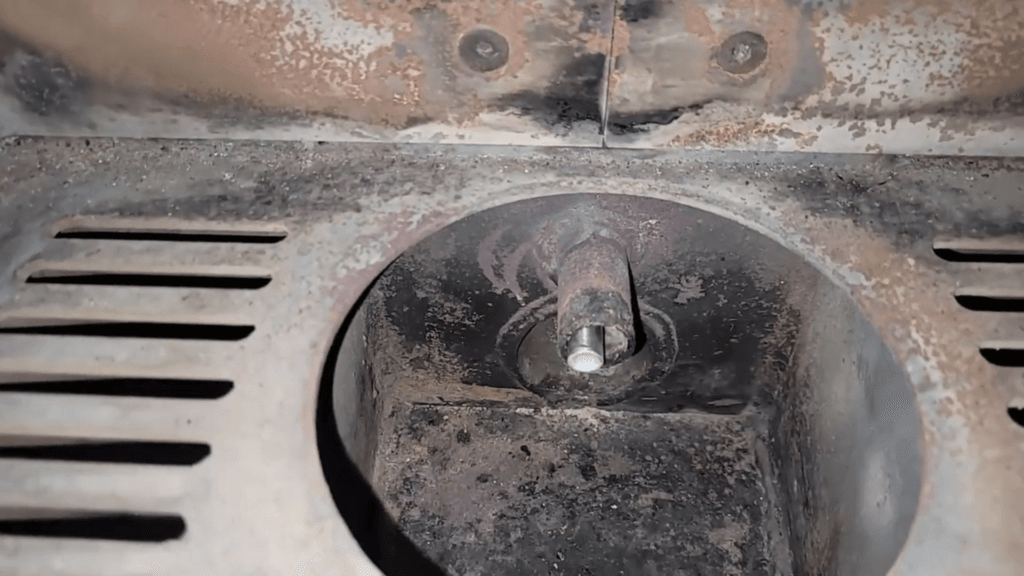
- Check from the front of the pellet heater behind the burn pot to see if the ignitor is sitting too far out or too far in
- You should adjust it until it’s just behind the lip of the metal tube and centred in position
- Important: Make sure the ignitor doesn’t touch any metal surfaces unless specified, as this can generate excess heat and cause damage
- Be careful not to make contact with the edges, as this can affect performance
Step 7: Secure and Test Connections
After adjusting the ignitor:
- Tighten the screw you previously loosened, ensuring not to overtighten as this could damage the ignitor
- Double-check the wires to make sure they are connected properly
- Check the ignitor position one last time, making sure it’s centred and not protruding from the tube behind the burn pot
Step 8: Final Assembly and Testing
With everything securely in place:
- Replace the access panel and tighten the screws
- Plug the pellet heater back in and turn the power on
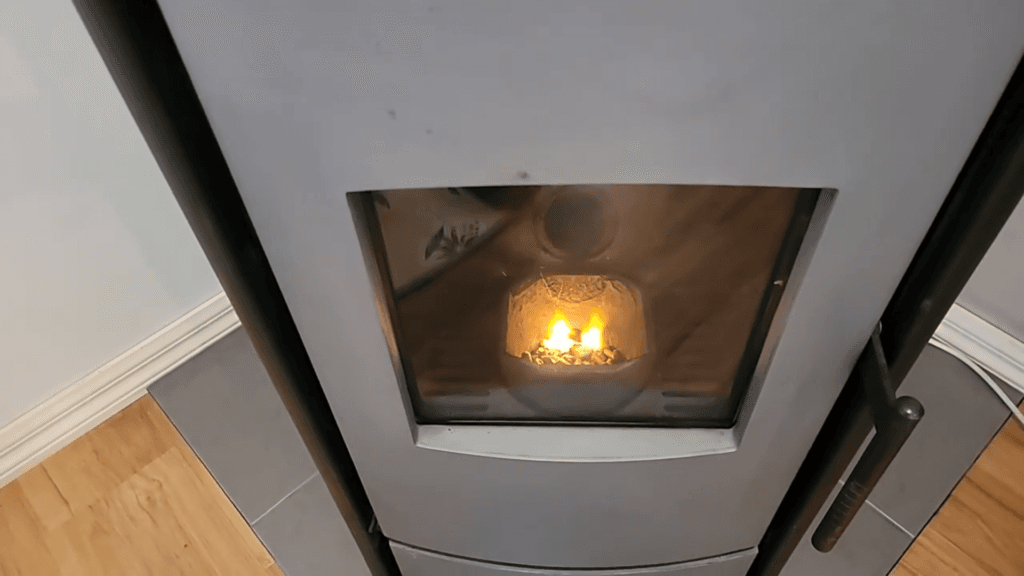
- Test the new ignitor by starting your pellet heater
Watch as the ignitor heats up and ignites the pellets. You should see a glowing red hot ignitor—hopefully leading to a nice, warm fire!
Maintenance Tips for Longer Ignitor Life
To maximise your new pellet heater ignitor’s lifespan:
- Keep it clean: Use a brush to remove dust and debris buildup that can reduce efficiency
- Regular inspection: Keep an eye on how long it takes for the fire to start or other problems during startup
- Follow manufacturer recommendations: Consider replacing the ignitor every few years depending on usage
- Maintain your heater: Keep the burn pot and ashtray clean, and ensure exhaust vents are clear
Before winter comes I like to do a little winter pellet heater checklist, where I go through and make sure everything is working before winter starts. This is a great time to check the ignitor is working properly and replace it if isn’t working properly.
Troubleshooting Common Issues
If your new ignitor isn’t working properly:
- Verify the ignitor wires are connected properly
- Check that the ignitor is properly positioned and not touching metal surfaces
- Ensure the replacement ignitor is compatible with your heater model
When to Call a Professional
Whilst ignitor replacement is generally straightforward, consider professional help if:
- You’re uncomfortable working with electrical components
- You encounter unexpected wiring configurations
- The ignitor continues to fail after replacement
Conclusion
Congratulations! You’ve successfully replaced the ignitor on your pellet heater. This simple DIY project not only saves you money but also ensures your heater runs efficiently and reliably. Regular pellet heater maintenance and cleaning, including timely ignitor replacement, will prolong your pellet heater’s lifespan and keep your home warm and cozy throughout the heating season.
By following these steps and understanding your pellet heater’s ignition system, you’re now equipped to tackle this essential maintenance task with confidence. Replacing an ignitor is a common task. To learn how to solve other issues and keep your heater in top shape, visit my comprehensive pellet heater troubleshooting and maintenance hub. If you found this guide helpful, please share it with others who may need it. For more tips and tricks on maintaining your heater, visit my YouTube channel and subscribe to our updates! Happy heating!
![]()
![]()